DIY Wood Bed Frame: A Comprehensive Guide to Renovating Your Bedroom on a Budget
Table of Contents
DIY wood bed frame is one of the most effective and efficient ways to transform your bedroom while saving hundreds of dollars. Building a custom wooden bed frame not only gives you complete control over the design and dimensions, but it also gives you a sense of accomplishment that can’t be matched by ready-made furniture.
Whether you’re a novice carpenter or someone looking to tackle their first major furniture project, this comprehensive guide will walk you through everything you need to know about building a stunning wooden bed frame that rivals expensive retail options.
Why Choose a DIY Wood Bed Frame Over Ready-Made Options?
The benefits of building your own wooden bed frame go beyond cost savings. When you build your own wooden bed frame, you’re investing in a piece that’s built to last, fits perfectly in your space, and is tailored to your taste.
Cost Comparison Data:
- Average price of a solid wood bed frame from a store: $400-$1,200
- Materials for a DIY wood bed frame: $75-$250
- Potential for savings: 60-80% off retail prices
Besides the physical benefits, DIY bed frames offer superior durability thanks to your control over the quality of the materials and construction methods. You’ll also gain valuable carpentry skills that you can apply to future projects in your home.
Basic Materials for a DIY Wood Bed Frame Project
Basic Wood Materials
For a Queen-Sized Wooden Bed Frame:
- 2×8 (8-foot) lumber – 2 pieces for side rails
- 2×6 (8-foot) lumber – 2 pieces for headboards/footboards
- 2×4 (8-foot) lumber – 4 pieces for support frame
- 1×4 (8-foot) lumber – 6 pieces for slats
- Wood screws (2.5 inches and 3 inches)
- Wood glue
- Sandpaper (120, 150, and 220 grit)
- Wood stain or paint of your choice
Wood Species Recommendations:
- Pine: Economical, easy to work with, absorbs stain well
- Oak: Durable, classic grain pattern, mid-priced
- Maple: Soft to the touch, strong, slightly more expensive
- Cedar: Naturally pest-resistant, fragrant, perfect for rustic styles
Basic Tools You’ll Need
Tool Requirements Essentials:
- Circular saw or miter saw
- Drill bit with bits
- Pocket template (recommended)
- Tape measure
- Square
- Clamps
- Safety equipment (safety goggles, dust mask)
Optional but helpful:
- Router for rounded edges
- Orbital sander for a smooth finish
- Craig template for professional joints
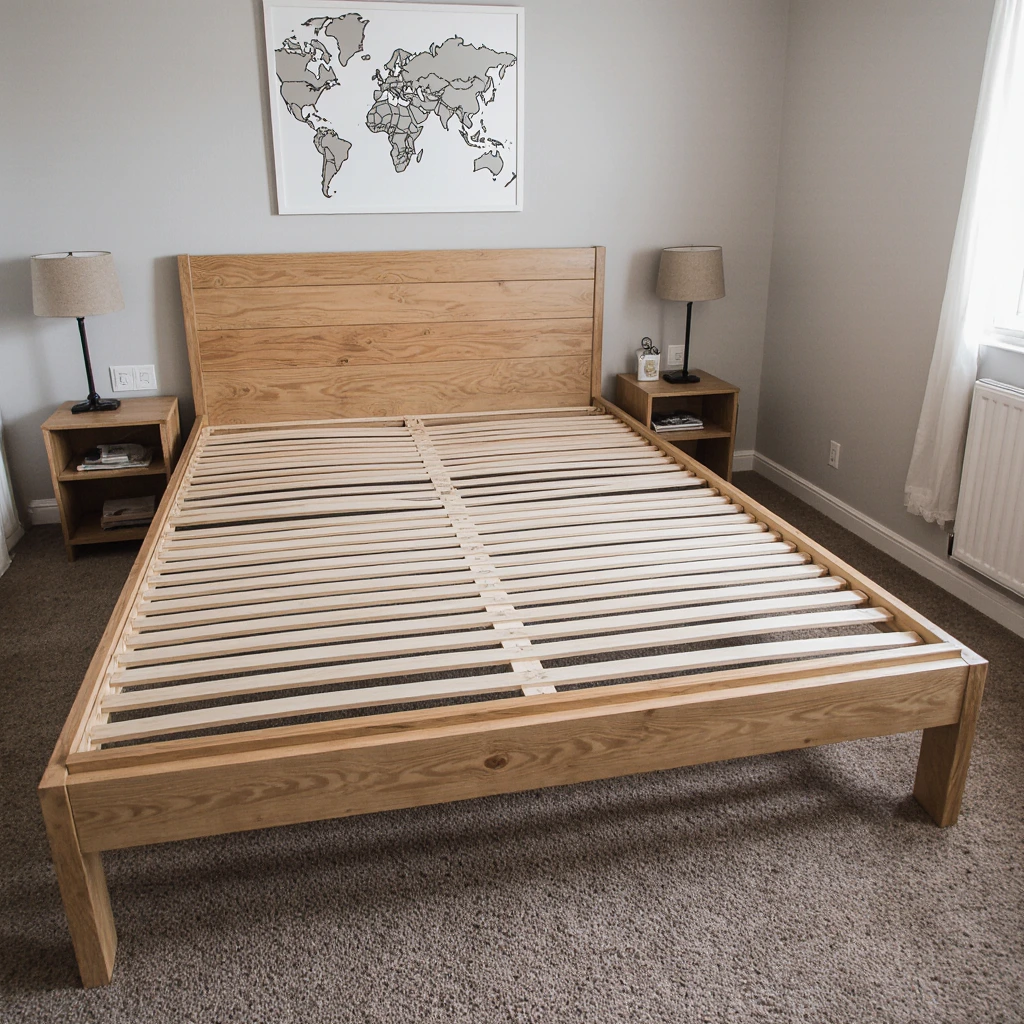
Step-by-Step Guide to Building a DIY Wooden Bed Frame
Step 1: Plan and Measure
Before cutting any wood, draw a detailed plan of your DIY wooden bed frame. Standard mattress sizes require specific frame dimensions:
- Twin: 38″ x 75″
- Full: 54″ x 75″
- Queen: 60″ x 80″
- King: 76″ x 80″
Add 1-2 inches to these dimensions for a perfect mattress fit and ease of construction.
Step 2: Cutting the Wood
Cut the wood according to your plans:
To make a homemade queen-size wooden bed frame:
- Side rails: 2 x 82 inches
- Head/foot boards: 2 x 62 inches
- Support beams: 2 x 58 inches
- Slats: 13 x 58 inches
Pro Tip: Many lumber yards will cut pieces to size for a small fee, which saves time and ensures perfectly straight cuts.
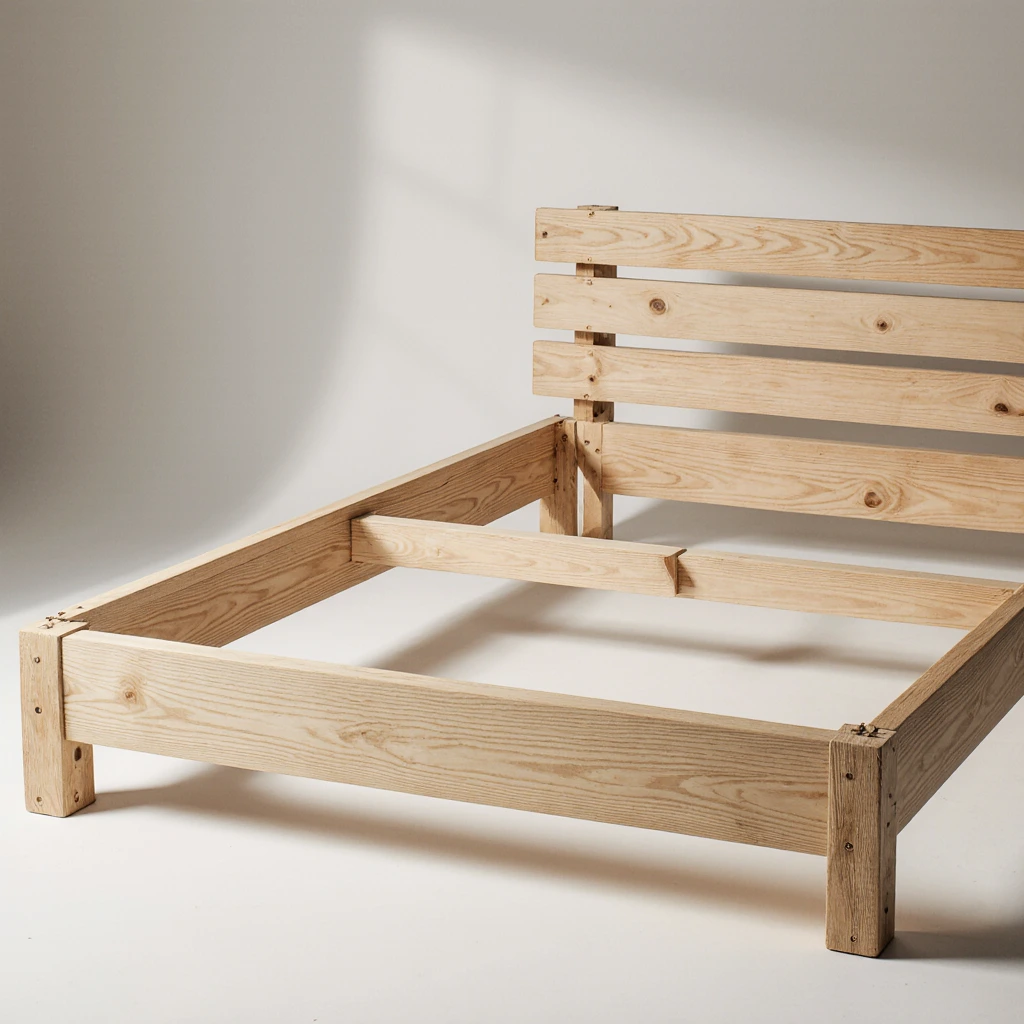
Step 3: Building the Frame
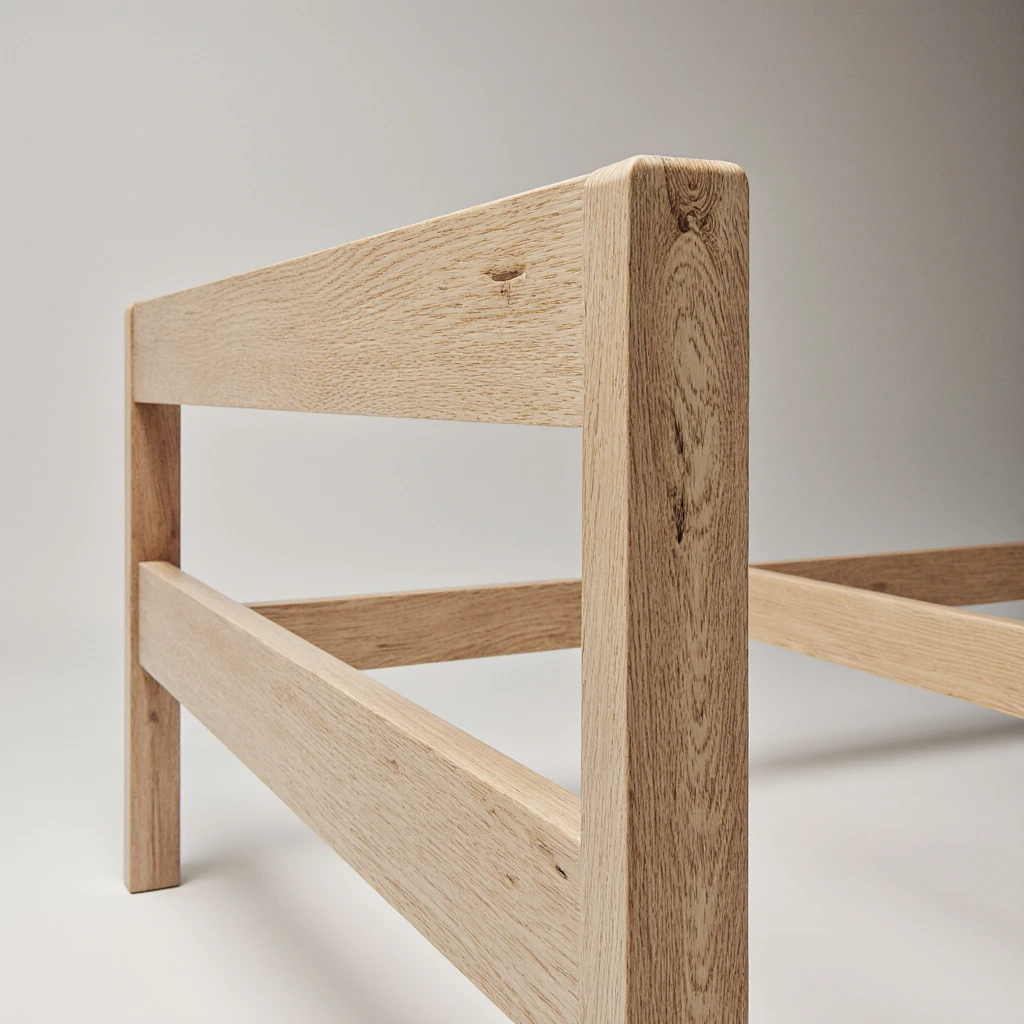
Begin by assembling the basic rectangular frame. Use pocket holes or traditional mortise-and-tenon joints for maximum strength.
- Attach the side rails to the head/foot boards using 3-inch screws and wood glue.
- Attach the center support beam to prevent sagging.
- Check for squareness using a tape measure to ensure the diagonal measurements are even.
Step 4: Install the Slat Support System
Create a slat ledge inside your wooden bed frame:
- Cut 1×2 slats to run along the inside edges of the frame.
- Install the slat supports 2 inches from the top of the frame.
- Space the slats evenly, approximately 4-6 inches apart, for optimal mattress support.
Step 5: Sand and Finish
A good finish is essential for a professional wooden bed frame:
- Start with 120-grit sandpaper to remove rough spots.
- Move up to 150-grit sandpaper for a smooth finish.
- Use 220-grit sandpaper for a silky finish.
- Apply a thin, even coat of stain or paint.
- Use polyurethane to ensure durability.
Advanced DIY Wooden Bed Frame Designs and Variations

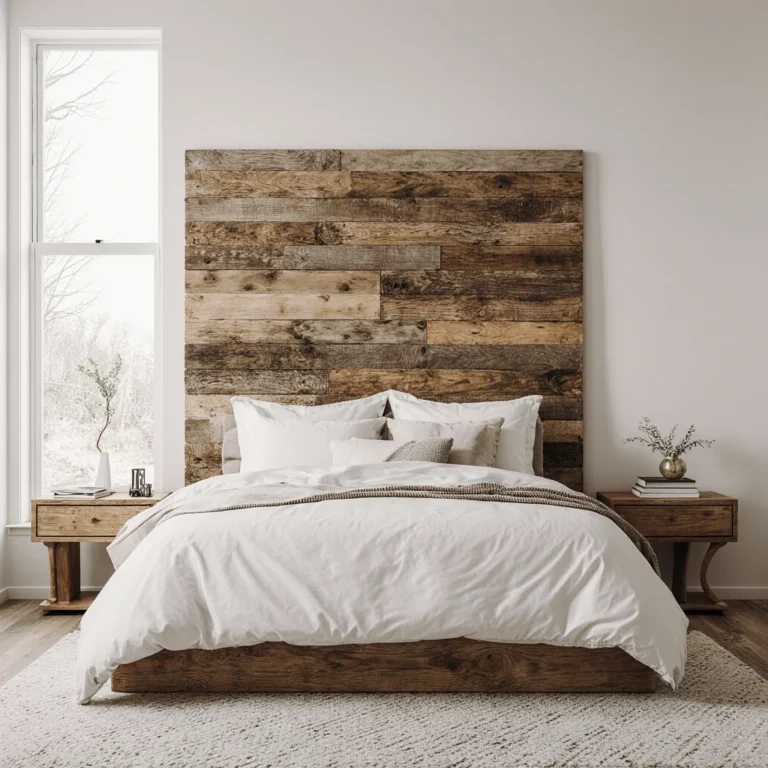
Rustic Farmhouse Style
Turn your simple wooden bed frame into a rustic masterpiece:
- Use reclaimed barn wood for an authentic feel.
- Add decorative metal brackets.
- Add rope or leather accents.
- Use antique finishing techniques.
Modern Minimalist Style.
Create a sleek, modern wooden bed frame you can make yourself:
- Use straight, clean lines.
- Add hidden hardware.
- Choose light woods like maple or birch.
- Add a floating side table.
Compact Design with Storage
Maximize storage potential with built-in storage:
- Add drawers under the frame
- Create built-in shelving in the headboard
- Install pull-out storage bins
- Add charging station features
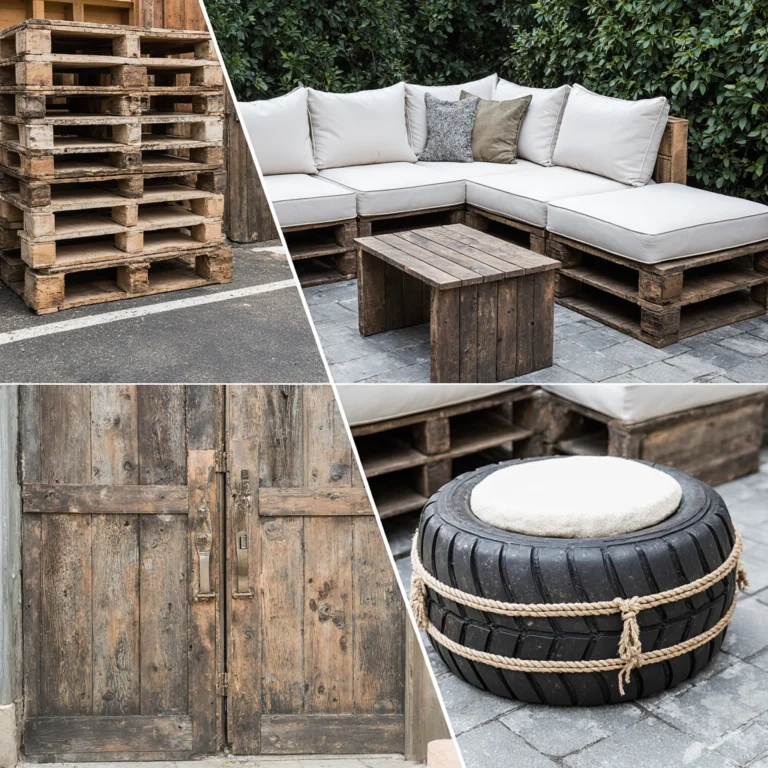
Upcycling and Upgrading Ideas for Your DIY Wooden Bed Frame
Repurposing Existing Furniture
Turn old furniture into components for your DIY wooden bed frame:
Dresser Makeover: Remove drawers and use the frame as the base for your headboard
Door Headboards: Vintage doors add a rustic touch to your headboard
Pallet Projects: Free pallets provide lumber for budget-conscious builders
Sustainable Material Options
Consider eco-friendly options for your DIY wooden bed frame:
- Reclaimed Wood: Reduces waste and adds a distinctive touch
- Bamboo: A fast-growing, sustainable alternative
- FSC-certified wood: Ensures responsible forestry practices
Seasonal Home Projects Themes for Wooden Bed Frames
Holiday-Inspired Tweaks
Christmas Season: Add built-in string lights to your headboard
Halloween: Create whimsical carved details in your headboard
Spring: Use natural-edged wood for a natural aesthetic
Incorporate a themed bedroom
Coastal Style: Use antique finishes and rope details
Industrial Style: Combine wood with metal pipe accents
Bohemian: Add carved details and exotic wood types
Common Mistakes in Wooden Bed Frames and How to Avoid Them
Structural Problems
Mistake: Insufficient support leads to sagging of the bed
Solution: Always use a center support beam and proper spacing between slats
Mistake: Weak joints
Solution: Use proper carpentry techniques and high-quality tools
Finishing Problems
Mistake: Skipping sanding steps
Solution: Take Your time to sand properly between each grit level
Mistake: Rushing the stain
Solution: Apply thin, even coats and allow adequate drying time
Layout Mistakes
Mistake: Incorrect measurements
Solution: Measure twice, cut once – check all dimensions before cutting
Mistake: Insufficient material planning
Solution: Create a detailed cutting list and purchase 10% more materials
Tool and Material Budget Breakdown
Economical Approach ($75-125)
- Pine: $60-80
- Tools: $10-20
- Finishing Materials: $15-25
- Total: $85-125
Quality Construction ($150-250)
- Hardwood: $100-150
- Quality Tools: $20-40
- Professional Finishing: $25-50
- Total: $145-240 American
Tool Investment Considerations
If you don’t have basic tools, consider:
- Rental Options: Many hardware stores offer equipment rentals.
- Borrowed Tools: Ask friends or neighbors.
- Starter Tool Kits: Invest in high-quality, basic tools for your future projects.
Safety Considerations for Building Your Own Wooden Bed Frame
Workshop Safety
Always keep safety top of mind when building your own wooden bed frame:
- Wear safety goggles when cutting or drilling.
- Use dust masks when sanding.
- Ensure good ventilation when applying finishes.
- Keep first aid supplies handy.
Structural Safety
Ensure your finished wooden bed frame meets safety standards:
- Test the weight capacity before use.
- Check all connections regularly.
- Inspect sharp edges that could cause injury.
- Ensure stability to prevent tipping.
Maintenance and Care Your Handcrafted Wooden Bed Frame
Routine Maintenance Schedule
Monthly: Check all screws and connections for looseness.
Quarterly: Clean with a suitable wood cleaner.
Annually: Check the finish and add touch-ups as needed.
Long-Term Care
Refinish: Plan to refinish every 5-7 years depending on wear.
Replace Hardware: Replace worn screws or brackets as needed.
Structural Repairs: Address any vibration or damage immediately.
Conclusion
Building a DIY wooden bed frame isn’t just a weekend project; it’s an investment in your home, your skills, and your budget. With careful planning, quality materials, and attention to detail, you’ll create a beautiful, durable bed frame that will serve you for years to come.
The joy of sleeping on a DIY bed is incomparable, and you can invest the money you save in other bedroom improvements or future DIY projects. Remember, every experienced carpenter started with their first project, and your DIY wooden bed frame could be just the beginning of a lifelong hobby.
Ready to start your DIY wooden bed frame project? Share your plans, progress photos, and final results with our community! Sign up for our newsletter to receive more affordable DIY tutorials and exclusive project guides delivered directly to your inbox.
Best Amazon Picks :
FAQs
Q: How long does it take to build a wooden bed yourself? Frame?
A: Most beginners can build a simple wooden bed frame themselves in 6-8 hours over a weekend. This includes cutting, assembling, and finishing. More complex designs may take 10-12 hours.
Q: What is the best type of wood for a wooden bed frame for beginners?
A: Pine is ideal for beginners due to its affordability, ease of work, and availability. It is soft enough for easy drilling and cutting, yet strong enough for furniture making.
Q: Can I build a wooden bed frame myself without power tools?
A: While it is possible, power tools make the project easier and more precise. You will need at least a drill. Consider borrowing or renting tools if you don’t own them.
Q: How much weight can a wooden bed frame hold?
A: A well-built wooden bed frame built yourself using 2×8 lumber and a suitable support structure can easily hold 500-700 pounds, which is within the safe limits for most users.
Q: Do I need any special tools for a homemade wooden bed frame?
A: Basic wood screws, washers, and angle brackets are sufficient for most designs. Bed rail fasteners also provide extra strength for frames that are moved frequently.
Q: How do I ensure my homemade wooden bed frame doesn’t squeak?
A: Use high-quality fasteners, ensure tight connections, and consider adding felt pads between the metal and wood contact points. Good carpentry is key to preventing squeaks.
Q: Can I modify designs to fit different mattress sizes?
A: Absolutely! Simply adjust the dimensions appropriately. Remember to maintain proper spacing between supports and ensure structural integrity regardless of size.