DIY Furniture: Transform Your Home with Handmade Furniture Pieces That Reflect Your Style
Table of Contents
Creating DIY furniture has become one of the most rewarding ways to personalize your living space while saving money and unleashing your creativity. Whether you’re a complete beginner or a seasoned craftsman, making your own furniture offers endless possibilities to design exactly what you need for your home. The joy of using a handcrafted table or relaxing in a chair you’ve crafted is unparalleled.
In today’s world of mass-produced furniture, handcrafted pieces stand out as a unique expression of personality and skill. Handmade furniture projects not only save you hundreds or even thousands of dollars, but they also allow you to create pieces that perfectly fit your space, style, and functional needs. Plus, you’ll gain valuable woodworking skills that will serve you for years to come.
Why Choose DIY Furniture Over Ready-Made Furniture?
Financial Benefits and Cost Savings
DIY furniture can cut costs by 50-80% compared to purchasing similar-quality furniture from furniture stores. You can create a custom dining table, which can cost between $800 and $1,200 in stores, with materials costing between $200 and $400, depending on your choice of wood and the complexity of the design.
Complete Customization and Design Freedom
When you create home furniture, every dimension, finish, and detail is under your control. Need a bookshelf that fits perfectly in that awkward corner? Want a coffee table that’s just the right height for your sectional? Home design makes it possible.
Quality Control and Durability
Many mass-produced furniture uses plywood, expensive tools, and shortcuts that affect its longevity. You can handcraft your furniture using solid wood, high-quality joinery, and attention to detail to ensure it lasts for decades.
Environmental Impact and Sustainability
Making furniture from recycled wood, upcycling existing pieces, or choosing locally sourced materials significantly reduces your environmental footprint compared to purchasing mass-produced pieces shipped from overseas.
Essential Tools and Materials for Home Furniture Projects
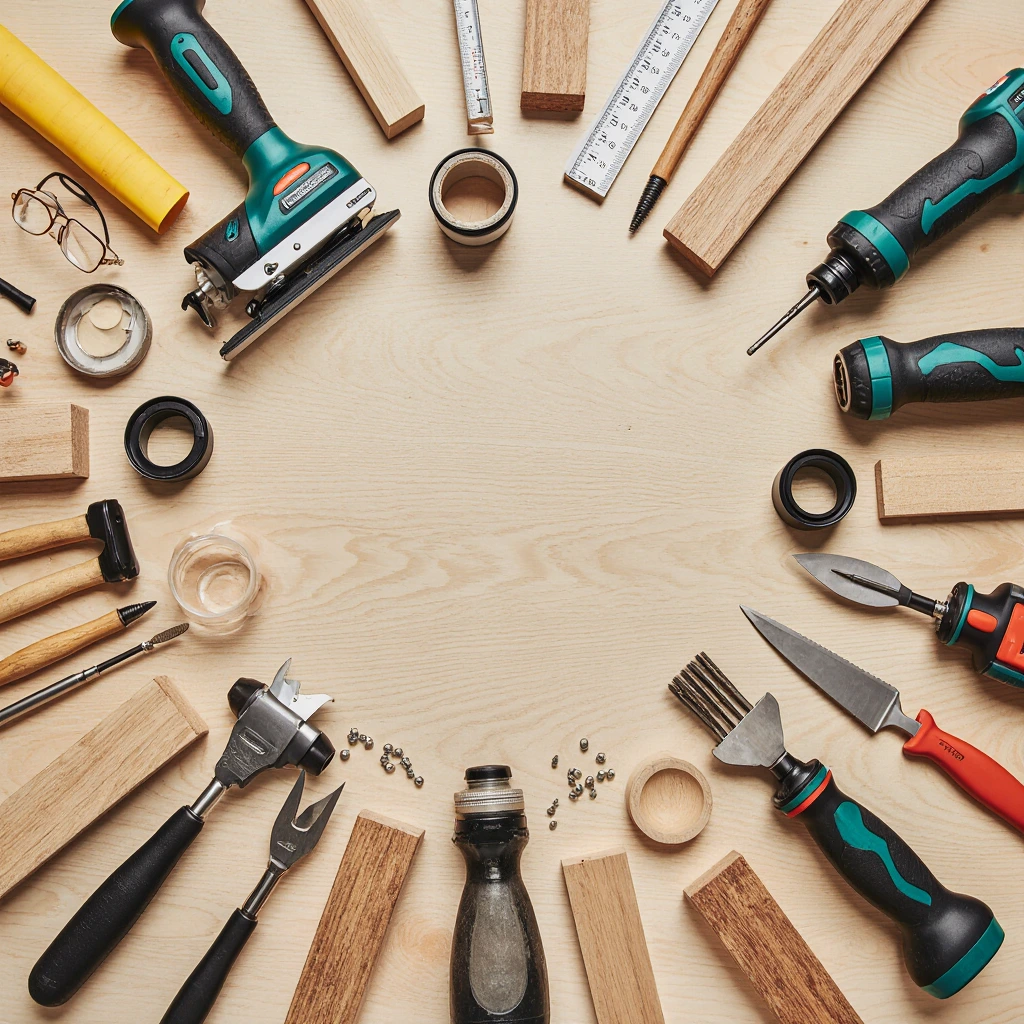
Essential Toolkit for Beginners
Beginning your DIY furniture-making journey doesn’t require an entire workshop. Here are the essential tools that will complete 80% of your projects:
Power Tools:
- Circular saw or miter saw for cutting wood
- Drill/screwdriver with various bits
- Random orbital sander for smooth finishes
- Jigsaw for curved cuts and fine work
Hand Tools:
- Tape measure and square for precision
- Clamps (at least 4-6 different sizes)
- Chisels for fine work
- Hand squeegee for smoothing surfaces
Material Selection Guide
Softwoods (Economical Options):
- Pine: Affordable, easy to work with, absorbs stains well
- Cedar: Naturally rot-resistant, ideal for outdoor projects
- Spruce: Strong and stable, excellent for structural elements
Hardwoods (Premium Options):
- Oak: Durable, with beautiful grain patterns, a classic choice
- Maple: Hard surface, light color, ideal for painted pieces
- Walnut: Rich chocolate tones, luxurious Appearance
Finishing Tools and Supplies
Quality tools make the difference between professional and beginner results. Invest in:
- Wood screws in various lengths
- Wood glue (Titebond III for water resistance)
- Sandpaper (120, 150, 220 grit)
- Wood stain or stain depending on the desired finish
- Polyurethane or wax for protection
7 Easy Furniture Projects for Beginners
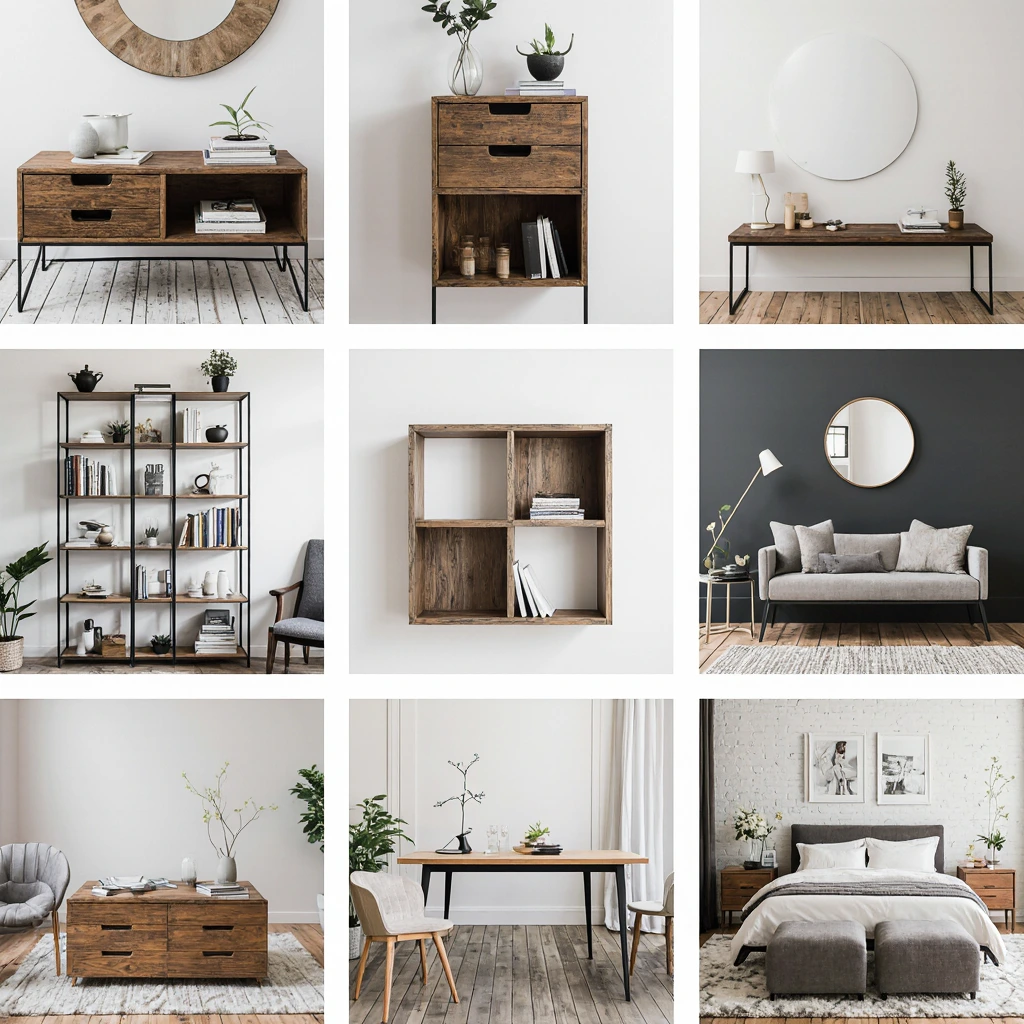
1. Rustic Coffee Table with Storage
Difficulty Level: Beginner
Time Required: 4-6 Hours
Materials Needed: Pine boards, wood screws, stain
This simple and functional coffee table features a lower shelf for books and magazines. Its rustic design is perfect for rustic, industrial, or casual living rooms.
Step-by-Step Process:
- Cut all wood to size: top (48″ x 24″), legs (16″ each), and support boards. 2. Sand all pieces, starting with 120-grit sandpaper and ending with 220-grit sandpaper.
- Assemble the base frame using wood screws and glue.
- Secure the tabletop with pocket screws for a sleek finish.
- Install the bottom shelf between the support bars.
- Apply your chosen paint in thin, even coats.
- Finish with two coats of polyurethane for durability.
2. Floating Side Tables with Hidden Storage
Difficulty Level: Medium.
Time Required: 6-8 hours per pair.
Materials Required: Solid wood, hidden hinges, magnetic clips.
These space-saving side tables mount directly to the wall and feature hidden compartments for charging cords and personal items.
Installation Features:
- Uses a French-style wall-mounted mounting system for secure installation.
- Router connectors for clean, professional connections.
- Soft-close hinges for smooth operation.
- Includes cable management slots for charging.
3. Rustic Dining Bench
Difficulty Level: Beginner – Intermediate
Time Required: 5-7 hours
Materials Needed: 2×10 and 2×4 lumber, mounting screws
This sturdy bench complements any dining table and comfortably seats 3-4 people. Its design is simple yet durable.
Key Construction Points:
- Use mortise-and-tenon joints for maximum durability
- Move the legs slightly outward for stability
- Sand thoroughly between coats of paint
- Add a cushion for extra comfort
4. Modular Bookshelf System
Difficulty Level: Intermediate
Time Required: 8-12 hours
Materials Needed: Plywood, veneer, shelf studs
Create a customizable storage solution to fit your needs. Individual units can be stacked and rearranged as space changes.
5. Industrial Pipe Desk
Difficulty Level: Beginner
Time Required: 3-4 Hours
Materials Required: Reclaimed Wood, Black Iron Pipe, Edges
Combine rustic wood and industrial metal for a distinctive desk in any home office or study space.
6. Storage Ottoman with Upholstery
Difficulty Level: Intermediate
Time Required: 6-8 Hours
Materials Required: Plywood, Foam Filling, Fabric, Furniture Legs
This dual-purpose piece provides seating and hidden storage, while adding a soft touch to your DIY furniture collection.
7. Outdoor Adirondack Chairs
Difficulty Level: Advanced Beginner
Time Required: 10-12 Hours per Chair
Materials Required: Cedar Planks, Stainless Steel Screws, Outdoor Finish
Create classic outdoor seating that will last for decades with proper care and maintenance.
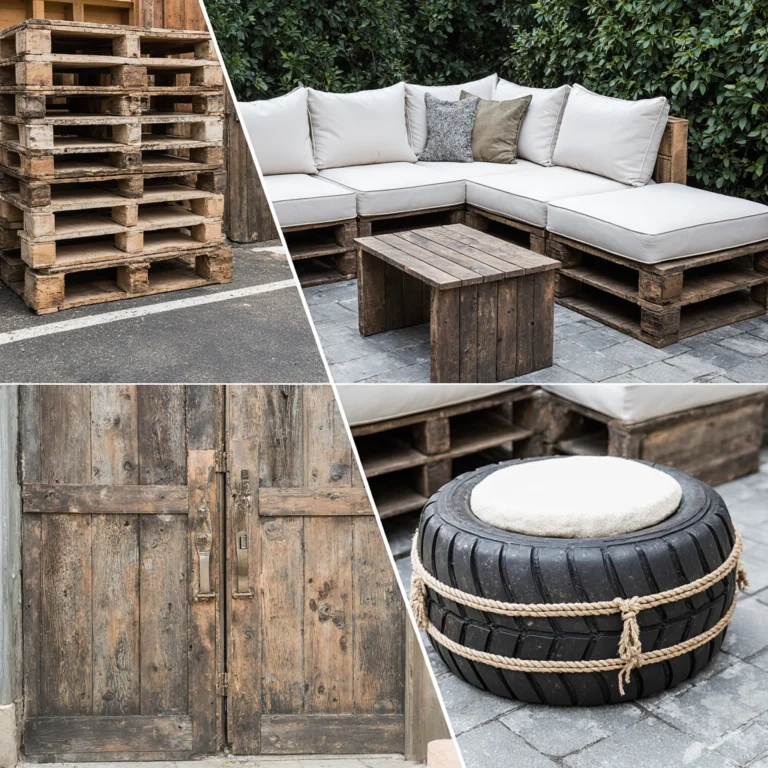
Recycling and Repurposing Ideas
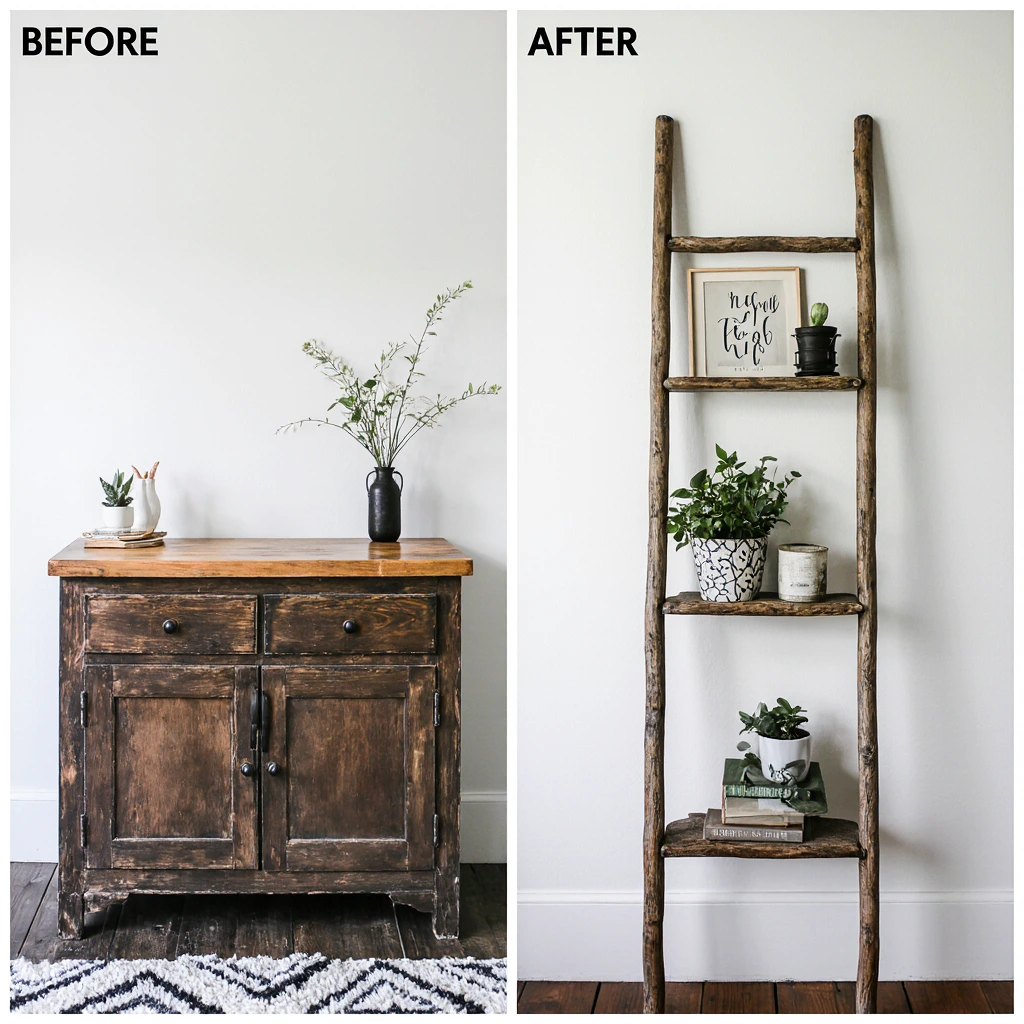
Transforming Thrift Store Finds
Recycling existing furniture is a great way to practice the art of DIY furniture making while creating unique pieces at a low cost. Here are some tried-and-true conversion strategies:
Convert a dresser into a kitchen island:
- Add casters for easy mobility
- Install a dining table top for prep work
- Add hooks for hanging kitchen utensils
- Paint a chalk-colored finish for a classic look
An old ladder-style bookshelf:
- Clean and sand thoroughly
- Add wooden shelves between the steps
- Paint the exterior with a vintage finish for a charming rustic touch
- Perfect for displaying plants and books
Creative Repurposing Projects
Wooden crate storage solutions:
- Stack and secure them in modular shelving
- Add casters for mobile storage
- Install LED strip lighting for display cabinets
- Use them as drawer organizers in closets
Platform furniture transformations:
- Coffee tables with built-in storage
- Vertical planters for gardens
- Outdoor benches with cushions
- Wall-mounted spice racks for kitchens
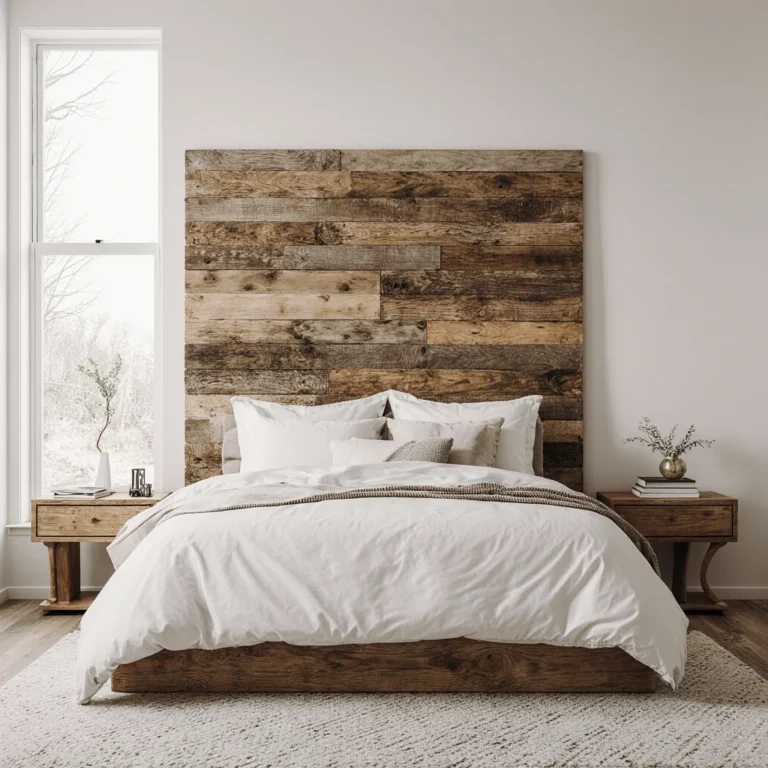
Seasonal and themed home furniture projects
Spring and summer projects
Garden furniture:
Make Weather-resistant pieces made from cedar or teak. Consider building:
- Planter boxes with built-in seating
- Outdoor dining sets with umbrella holes
- Benches for pool towel storage
- BBQ prep stations with storage
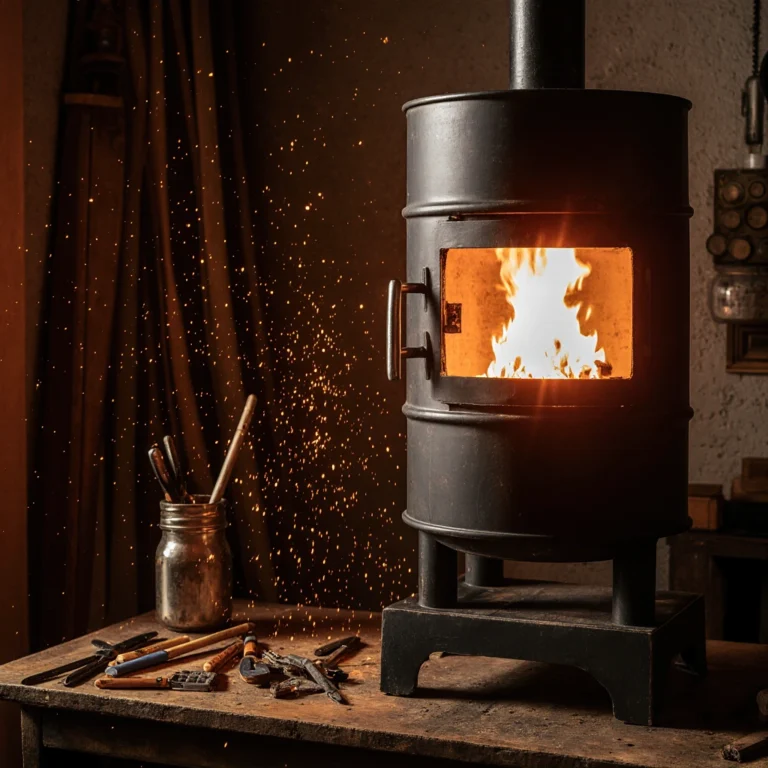
Fall and Winter Interior Decorating
Warm Interior Decorating Pieces:
Focus on warm and cozy furniture for indoor living:
- Reading nooks with built-in storage
- Stovetop tool holders and log storage
- Holiday decoration display racks
- Mudroom organizing systems
Common DIY Furniture Mistakes and Their Solutions
Measuring and Layout Mistakes
Problem: Cutting pieces to the wrong dimensions or forgetting to calculate material thickness.
Solution: Create detailed cutting lists and double-check all measurements. Follow the “measure twice, cut once” principle precisely.
Inadequate Sanding and Prepping
Problem: Rough surfaces, visible scratches, or uneven stain absorption. Solution: Clean the sandpaper regularly (120, 150, and 220 grit). Remove dust between each change in grit.
Poor Joint Selection and Implementation
Problem: Weak joints that become damaged with normal use.
Solution: Learn proper carpentry techniques. Use proper fasteners for the application. Do not rely solely on screws for structural connections.
Finishing Problems
Problem: Paint spots, brush marks in the paint, or inadequate protection.
Solution: Use a pre-staining conditioner on softwoods. Apply thin, even coats of finish. Allow sufficient drying time between applications.
Ignoring Wood Movement
Problem: Cracking, warping, or joint damage due to seasonal wood expansion and contraction.
Solution: Understand local climate patterns. Use appropriate construction techniques that allow for wood movement.
Advanced Techniques for Professional Results
Carpentry Methods to Improve the Quality of Your Work
Pocket Screw Carpentry:
- Creates strong, hidden joints
- Ideal for building facade frames
- Requires minimal skill to master
- Significantly speeds up the assembly process
Joints and Rabbets:
- Professional shelving installation
- Stronger than simple butt joints
- Requires a router or dado blade setup
- Useful for cabinet projects
Finishing Techniques for Durability
Multi-Layer Systems:
Apply finishes in thin layers, lightly sanding between layers with 320-grit sandpaper. This adds depth and durability unmatched by single thick layers.
Grain Enhancement Methods:
- Use gel stains for a uniform color on stained woods.
- Apply grain filler to open-grain woods like oak.
- Try ebony techniques for distinctive effects.
Building a DIY Furniture Workshop
Space Planning and Organization
Even small spaces can accommodate DIY furniture projects with smart planning:
Primary Work Areas:
- Assembly area (minimum 8 feet x 4 feet)
- Easy-access tool storage
- Wood rack for material storage
- Ventilated finishing area
Multipurpose Solutions:
- Folding work tables for small spaces
- Rolling tool carts for easy mobility
- Wall-mounted storage with clips
- Wood pallet organizing systems
Tool Acquisition Strategy
Build your tool kit systematically based on project needs rather than purchasing everything at once:
Stage 1: Basic hand tools and a high-quality power tool
Stage 2: Add specialized tools as project requirements require
Stage 3: Invest in precision tools for advanced work
Stage 4: Consider using fixed tools for efficiency
Safety Considerations for DIY Furniture
Personal Protective Equipment
Safety Equipment Essentials:
- Safety goggles for all cutting operations
- Dust masks for sanding and finishing
- Hearing protection when using power tools
- Work gloves for handling raw wood
Workshop Safety Practices
Fire Prevention:
- Store oily rags in metal containers
- Keep a fire extinguisher handy
- Maintain good ventilation during finishing
- Avoid smoking or open flames near finishes
Tool Safety:
- Keep blades sharp for safer cuts
- Use push sticks and feather boards
- Keep work surfaces clean
- Unplug when changing blades
Conclusion
Making DIY furniture opens up a world of possibilities for personalizing your home while developing valuable skills and saving significant amounts of money. The projects we’ve covered provide a solid foundation for beginners, while posing challenges for more experienced builders.
Remember, every experienced carpenter started with simple projects and gradually developed their skills through practice and patience. Don’t let initial flaws discourage you; each mistake teaches you valuable lessons that will improve your next project.
The secret to success in DIY furniture making is to start with workable projects, gradually invest in high-quality materials and tools, and take the time to learn the proper techniques. Your skills will improve with each piece you complete.
Ready to get started building? Choose one beginner’s project that excites you, gather your materials, and begin crafting furniture that perfectly suits your home and style. Share photos of your completed projects in the comments below; we love seeing the amazing work our readers create!
Don’t forget to sign up for our newsletter for more DIY furniture plans, technique tutorials, and seasonal project ideas delivered directly to your inbox.
Best Amazon Picks :
FAQs
Q: How much money can I actually save by making my own furniture instead of buying it?
A: Most DIY furniture makers save between 50% and 80% compared to finished furniture of the same quality. A $1,000 dining table in stores might cost between $200 and $300 in materials to make it yourself, depending on the choice of wood and tools.
Q: What is the best type of wood for beginners?
A: Pine is excellent for beginners because of its affordability, availability, and flexibility. It’s easy to cut, absorbs stains well, and repairs are inexpensive. Cedar is another good choice for outdoor projects because of its natural resistance to weathering.
Q: How long does a homemade furniture project typically take to complete?
A: Simple projects, such as coffee tables or benches, typically take 4 to 8 hours spread over a weekend. More complex pieces, such as dining tables or entertainment centers, may require 15 to 25 hours spread over several weekends. Planning and preparation time should be added to the actual construction time.
Q: Do I need a full workshop to build furniture at home?
A: No! Many beautiful pieces of furniture can be built with simple tools in the garage, basement, or even a spare bedroom. Start with portable tools and gradually expand your workspace as your interest and skills develop.
Q: What is the most important tool investment for making homemade furniture?
A: A good circular saw or miter saw is usually the first versatile power tool investment. It handles most of the parts needed for furniture projects and significantly speeds up the construction process compared to hand saws.