Easter Decorations DIY: 15 Budget-Friendly Projects to Refresh Your Home This Spring
Table of Contents
Easter Decorations DIY projects offer the perfect opportunity to create stunning, personalized holiday decorations without breaking the bank. Whether you’re hosting a brunch, planning an egg hunt, or simply want to add a touch of spring to your home, making your own Easter decorations allows you to unleash your creativity while saving money.
DIY Easter decorations are becoming increasingly popular, with Pinterest searches for “Easter crafts” increasing by 78% each spring. The beauty of making your own Easter decorations is that you can customize the colors, patterns, and styles to suit your unique taste, while engaging the whole family in fun and creative activities.
From simple paper crafts to elegant flower arrangements, this comprehensive guide will walk you through 15 budget-friendly Easter decorating ideas that anyone can master, regardless of their crafting experience level.
Why Choose Easter Decorations DIY ?
Making your own Easter decorations offers many benefits beyond just saving money. When you make your own Easter decorations, you invest in quality time with your family, reduce waste through recycling, and create treasured keepsakes that can be treasured for years to come.
Stock-made decorations often lack the personal touch that defines the holidays. DIY projects allow you to incorporate family traditions, favorite colors, and unique design elements that reflect your personality. Additionally, many commercial Easter decorations are made from non-recyclable materials, while DIY options often use sustainable and eco-friendly materials.
Research shows that engaging in creative activities, such as crafting, can reduce stress by up to 45% and improve overall mental health. Making Easter decorations becomes a therapeutic activity that brings joy even before the holiday.
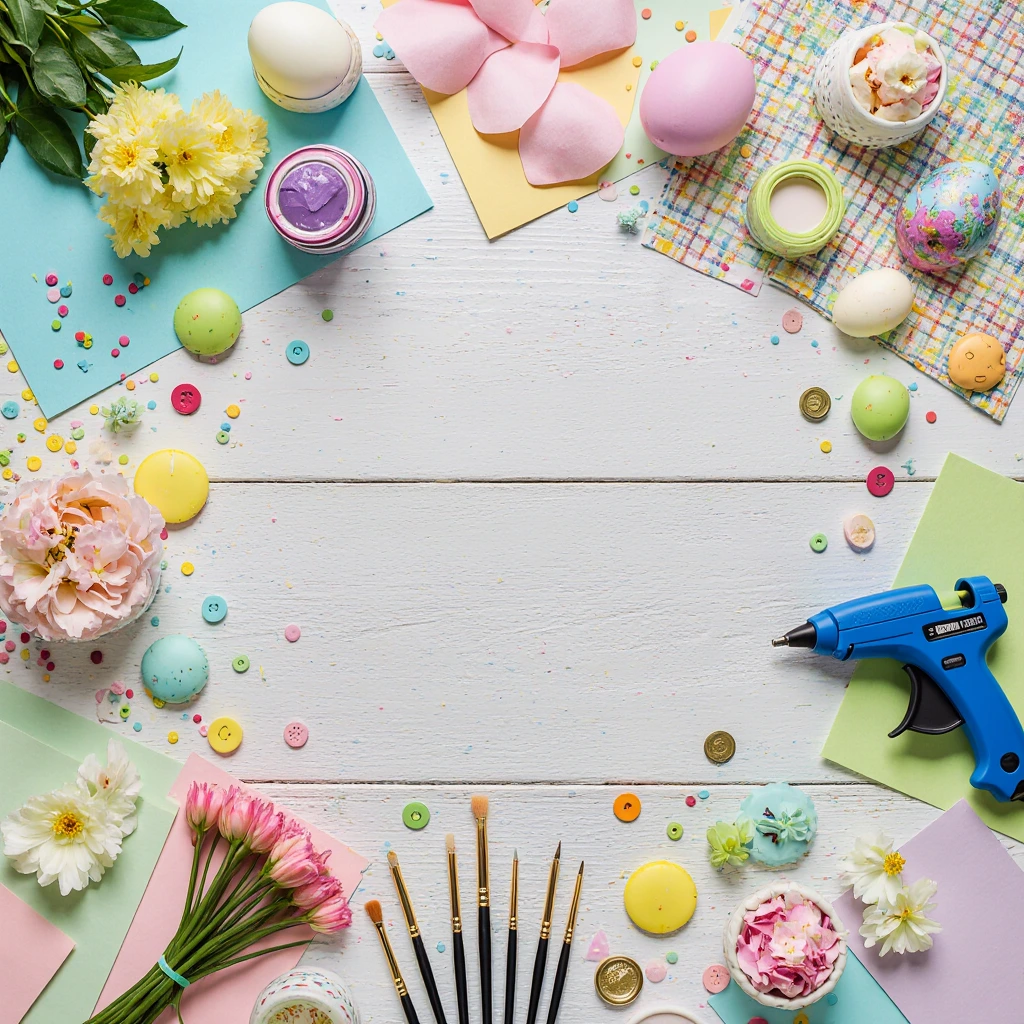
Essential Materials and Tools for Easter Crafts
Essential Craft Supplies
Before diving into specific projects, gather these essential materials that are suitable for many DIY Easter decorating projects:
Paper Products: Colored construction paper, tissue paper, crepe paper, and patterned scrapbook paper form the basis of many Easter crafts. Choose pastel colors like soft pink, lavender, mint green, and butter yellow for traditional Easter designs.
Adhesives: Craft glue, a hot glue gun with glue sticks, double-sided tape, and Mod Podge will meet most gluing needs. Each serves a different purpose depending on the materials used.
Decorative Items: Ribbons, string, buttons, fabric scraps, and artificial flowers add flair and visual appeal to your creations. Save plenty of them during post-holiday sales to maximize savings.
Tools That Make a Difference
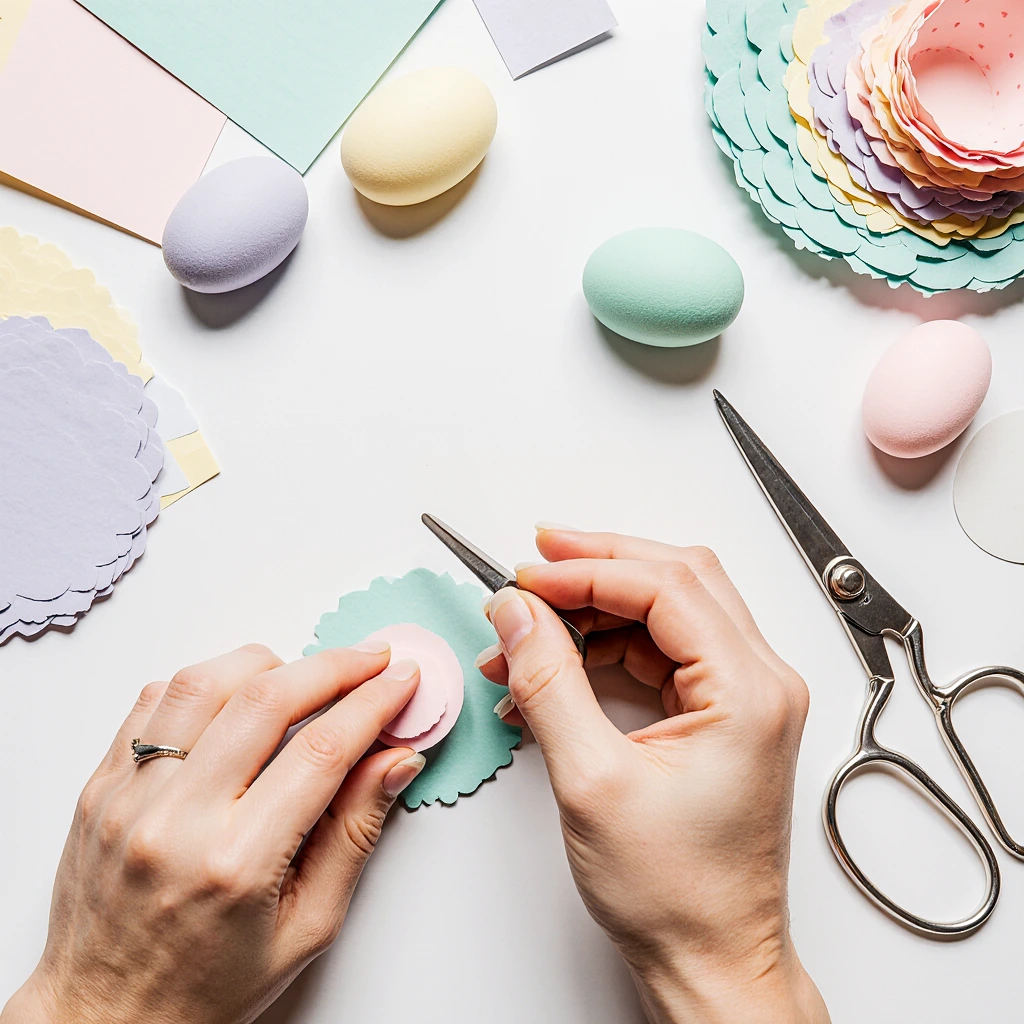
Cutting Tools: Sharp scissors, a craft knife, and decorative hem shears help achieve clean, professional results. A cutting mat protects surfaces and ensures straight lines.
Measuring and Marking: Rulers, pencils, and templates ensure accurate proportions and consistent results across multiple cuts.
Specialty Tools: A bone folder for delicate paper pleats, paintbrushes for fine work, and wire cutters for floral arrangements enhance your crafting skills.
15 Affordable Easter Decorating Projects for Home Paper Easter Decorations
1. Layered Paper Easter Eggs
Create multi-dimensional Easter eggs using colored construction paper and simple layering techniques. Cut egg shapes in graduated sizes, then stack them using foam adhesive dots to add depth. Add patterns using markers, stamps, or decorative paper scraps.
Materials Needed: Cardstock in three or four colors, foam dots, scissors, pencil
Time Required: 30 minutes for 6 eggs
Project Cost: Under $5
2. Spring Paper Wreaths
Turn plain paper into stunning spring wreaths using tissue paper flowers and embroidery hoops. This project combines the fun of flower making with the effect of a large ornament.
Steps:
- Cut tissue paper into 6-inch squares
- Stack 8-10 squares and fold them accordion-style
- Secure the center with thin wire
- Separate the layers and fluff them up to create full blooms
- Attach them to the embroidery hoop with hot glue
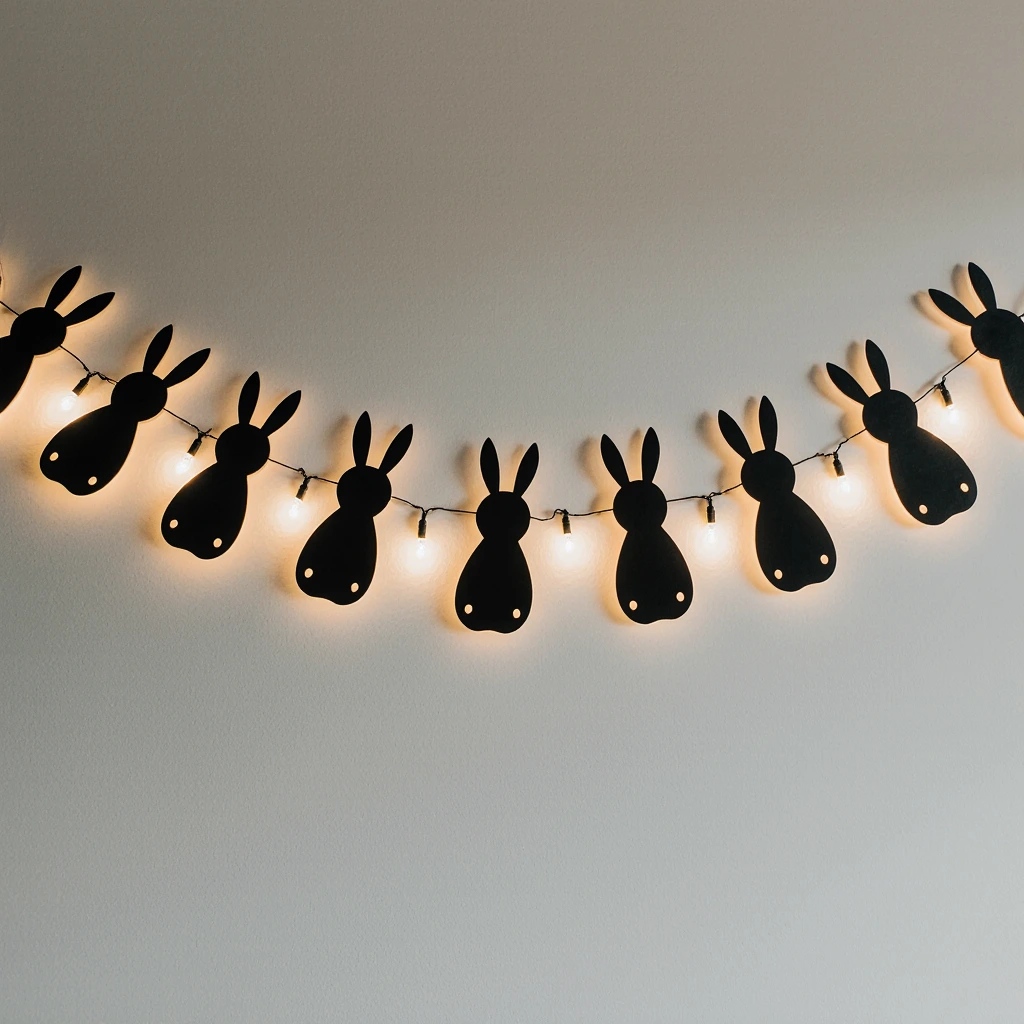
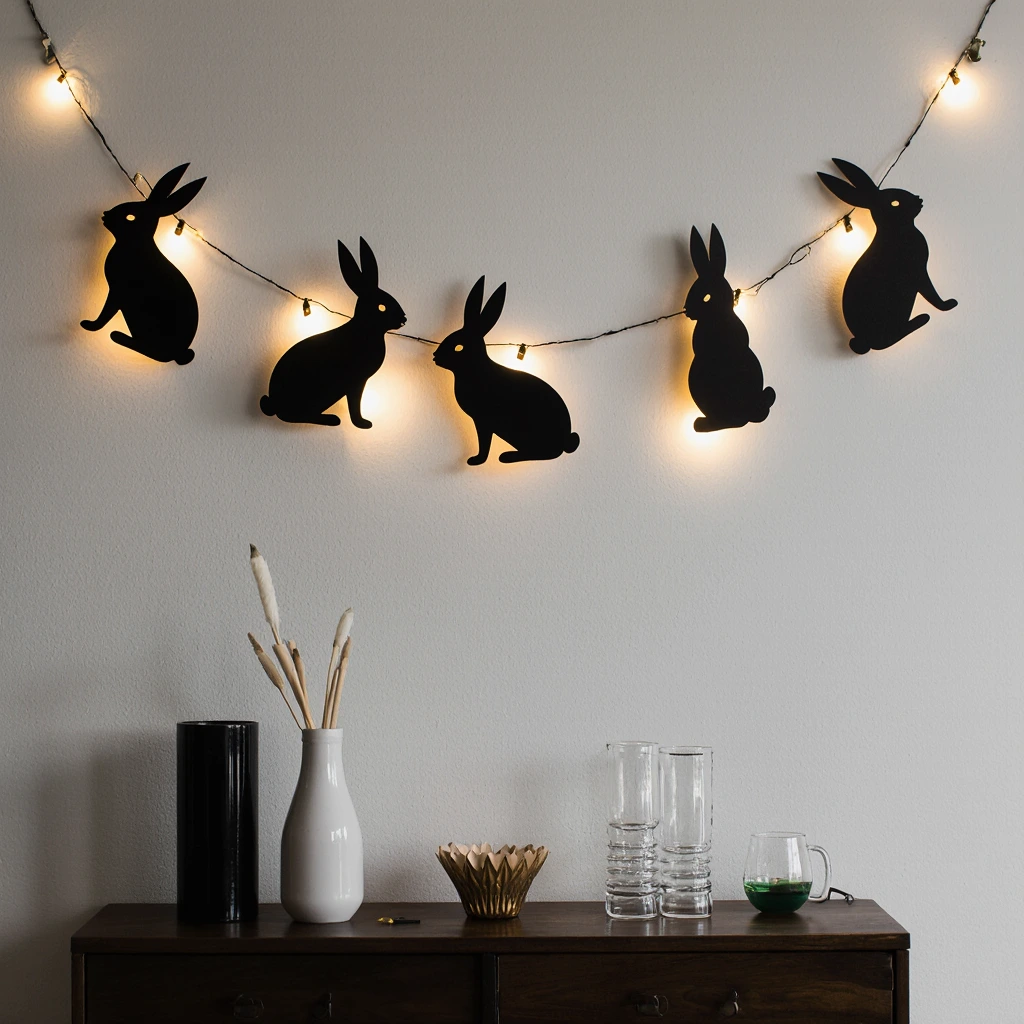
3. Bunny Wreath
Create charming bunny shapes using black cardstock and string lights for a modern Easter decoration that fits any room.
Materials: Black cardstock, string lights, scissors, small flower punch
Pro Tip: Vary the sizes of the bunnies for a decorative touch, and use battery-powered LED lights for safety.
Natural and Eco-Friendly Easter Decorations
4. Easter Nests from Twigs and Moss
Gather twigs from your garden to create rustic Easter nests perfect for displaying decorated eggs or spring flowers. This project helps you connect with nature while creating beautiful organic decorations.
Gather Materials: Find small, flexible twigs, moss, and small decorative eggs.
Collar Technique: Weave twigs into circles, secure them with thin wire, and then line them with moss.
5. Pressed Flower Easter Cards
Press spring flowers between heavy notebooks to make delicate, natural Easter cards. This traditional technique produces elegant results that the recipient will cherish.
Choose Flowers: Choose flat-bottomed flowers such as violets, violets, and small daisies.
Press Time: Allow two to three weeks for complete drying.
Assemble: Secure them to cardstock with spray adhesive and add simple greetings.
6. Easter Centerpieces from an Herb Garden
Plant fast-growing herbs such as parsley, chives, and mint in decorated containers to make Easter centerpieces that will continue to grow after the holiday is over.
Container Options: Clay pots, Mason jars, or recycled tin cans.
Decorating Techniques: Wrap in burlap, paint with chalkboard paint, or decoupage with Easter-inspired paper.
Recycling Easter Decorations
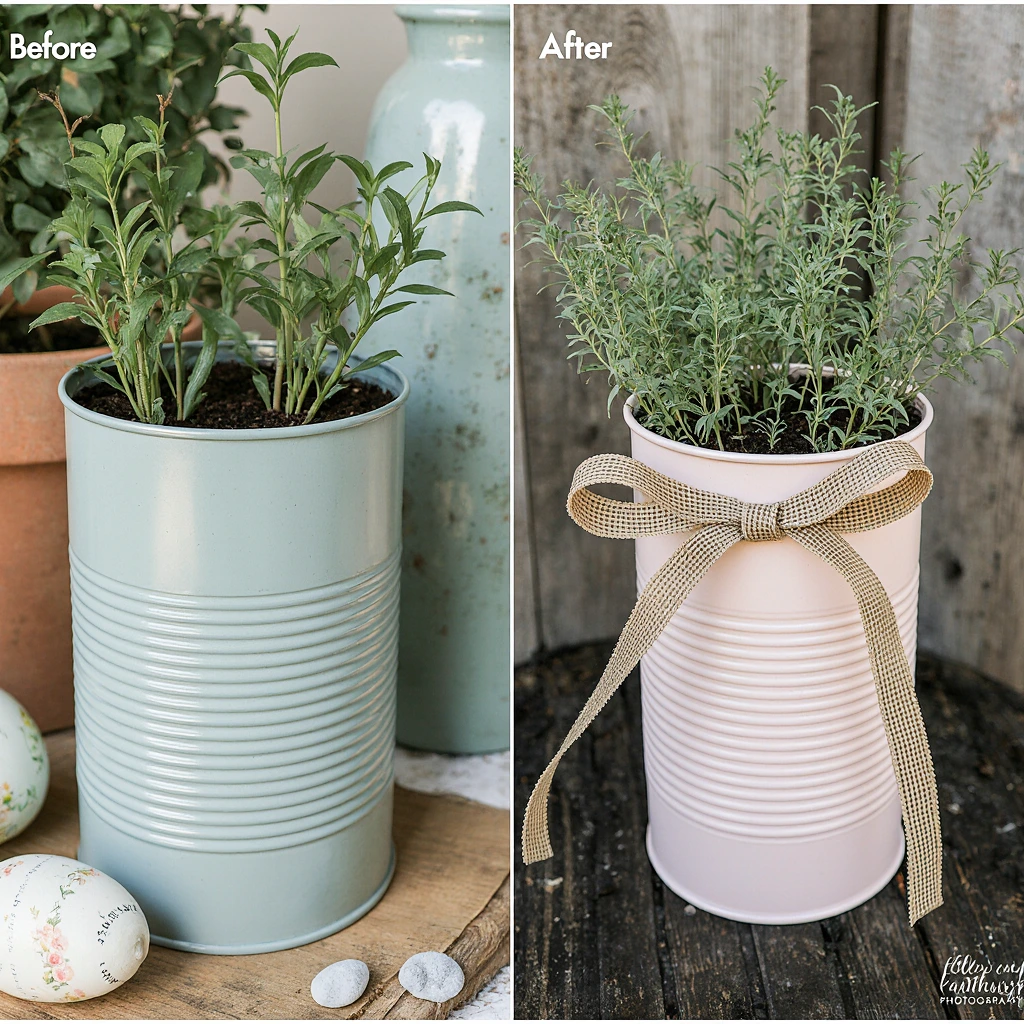
7. Tin Can Easter Planters
Turn empty tin cans into stunning Easter planters using paint, ribbon, and creativity. This project shows how everyday items can become beautiful decorations.
Prep: Remove labels completely and sand any sharp edges.
Decorating Options: Chalk paint for a matte finish, acrylic paint for added brightness, or decoupage with decorative paper.
Planting Suggestions: Small succulents, herbs, or spring bulbs are perfect.
8. Egg Carton Flower Ornaments
Turn egg cartons into delicate flowers for wreaths, garlands, or stand-alone decorations. This project highlights the possibilities of transforming recyclable materials.
Cutting Technique: Cut individual egg carton cups and trim the edges into petal shapes.
Color Options: Watercolors create soft, translucent effects, while acrylic paints add bold colors.
Collection Ideas: Assemble them on wire stems, attach them to wreaths, or create wall art arrangements.
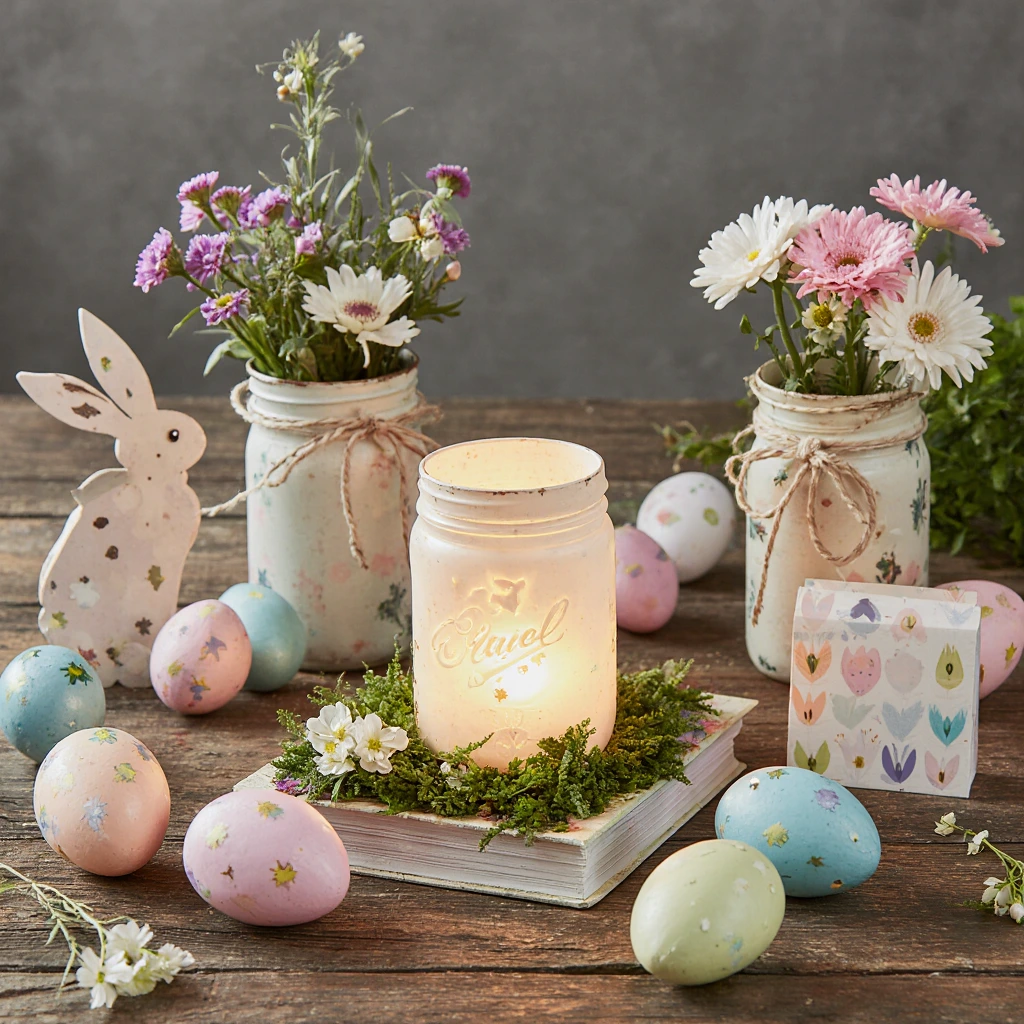
9. Mason Jar Easter Ornaments
Create charming Easter ornaments using Mason jars, tissue paper, and battery-operated tealights. These provide soothing ambient lighting, perfect for Easter gatherings.
Materials: Mason jars, colored tissue paper, Mod Podge, small battery-operated LED candles.
Method: Apply Mod Podge to the outside of the jar, then layer layers of tissue paper, then seal with additional Mod Podge.
Safety Note: Always use battery-powered lights to avoid fire hazards.
Easter Crafts from Fabric and Textiles
10. No-Sew Easter Bunny Pillows
Make adorable Easter bunny pillows using felt, fabric glue, and pillow stuffing. This project requires no sewing skills, but produces professional results.
Create the Pattern: Draw simple bunny shapes on paper, then trace them onto the felt.
**Assemble: Cut out two identical shapes, apply fabric glue around the edges, stuff lightly, and then secure.
*Decoration Ideas*: Add button eyes, embroidered details, or touches of fabric paint.
11. Scrap Easter Eggs
Use scrap fabric to create decorative Easter eggs with unique patterns and colors. This technique works well with leftover fabric from other projects.
Prepare the Base: Use foam or plastic eggs as shapes.
**Apply: Apply fabric pieces with Mod Podge, slightly overlapping for complete coverage.
**Finish: Add ribbon, buttons, or lace trim for added flair.
12. Burlap Easter Tree Skirts
Create rustic Easter tree skirts using burlap and simple trim. These trims protect surfaces and add a natural texture to your Easter decorations.
Measure: Draw circles 2-3 inches larger than the diameter of your tree’s base.
Finish the Edges: Fringe the edges naturally or use pinking shears to control fray.
Decorate Options: Stenciled designs, decorative flowers, or simple ribbon trim.
Advanced Easter Decorating Projects
13. Easter Scenes in a Terrarium
Create miniature Easter scenes inside glass containers using moss, small figurines, and creativity. These scenes will become works of art that capture the magic of spring.
Choose Containers: Use aquariums, large Mason jars, or custom terrarium containers.
Layer Technique: Start with a drainage layer, then add soil, moss, and decorative elements.
Maintenance: Mist lightly and place in indirect sunlight to prolong their life.
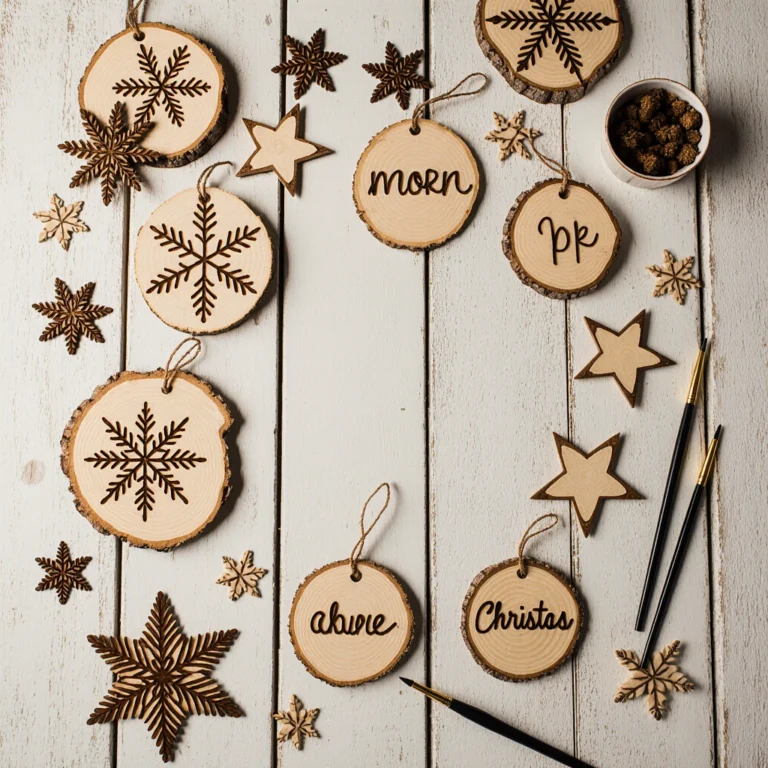
14. Easter Trees from Painted Twigs
Create elegant Easter trees using collected twigs, paint, and hanging ornaments. This project brings a spring vibe to your home while also providing a frame for displaying other crafts.
Choose Twigs: Choose distinctly shaped twigs and several smaller twigs.
Paint Options: White paint for a classic look, pastel colors for a soft spring feel, or leave them natural.
Display Ideas: Secure them in heavy vases and hang lightweight decorations.
15. Embroidered Easter Napkins
Add a personal touch to your Easter tablescape with hand-embroidered napkins featuring spring motifs. This project combines traditional techniques with a modern design sense.
Design Transfer: Use transfer paper or water-soluble markers to outline the designs.
Stitch Selection: Simple flowing stitches, French knots, and chain stitches produce stunning results.
Color Coordination: Match thread colors to your Easter tablescape for a cohesive design.
Tips for Successful Easter Decoration Projects
Planning and Preparation
Successful DIY Easter decoration projects begin with good planning. Set a schedule that allows for adequate drying time for the painted projects, taking into account the complexity of each craft. Many decorations can be made weeks in advance, while others featuring fresh flowers or plants should be completed before Easter.
Organize your workspace with good lighting, good ventilation, and all necessary tools at hand. Cover work surfaces with newspaper or plastic sheeting to protect them from adhesives and paints. ## Budget-Saving Strategies
Make the most of your decorating budget by purchasing your own supplies first. Check craft rooms, waste drawers, and storage areas for reusable materials. Visit dollar stores for basic supplies like paint, brushes, and containers.
Schedule your visits to the craft store with weekly sales and use store apps to access digital coupons. Many stores offer additional discounts on bulk purchases, making it cost-effective to collaborate with friends or neighbors on larger projects.
Quality Control and Safety
Ensure that all decorations meet safety standards, especially when children are present. Secure small parts that could pose a choking hazard, and use non-toxic materials whenever possible. Test adhesives and paints on inconspicuous areas before full application.
For outdoor decorations, choose weather-resistant materials and sealants to protect your creations from the vagaries of spring weather.
Common Mistakes in Home Easter Decorations and How to Avoid Them
Rushing the Process
The most common mistake in home Easter decoration projects is rushing through steps to complete the project quickly. This often results in uneven paint coverage, poor adhesion, or neglecting finishing details.
The Solution: Allow enough time for each step, especially drying times. Work on multiple projects simultaneously to maintain productivity while waiting for different stages to be completed.
Ignoring Proportion and Scale
Many home decorators struggle to create balanced displays because they don’t consider how different elements relate to each other in terms of size and visual weight.
The Solution: Arrange decorations before final placement, stepping back frequently to assess the overall balance. Use the rule of thirds to arrange walls and vary the heights of assembled displays.
Overcomplicating Simple Projects
Beginning crafters often add unnecessary complexity to simple projects, leading to frustration and disappointing results.
The Solution: Master basic techniques before attempting advanced variations. Focus on the precise execution of simple designs rather than complex patterns beyond your current skill level.
Poor Color Coordination
Sometimes enthusiastic interior designers choose too many colors or clashing combinations, creating visual clutter rather than harmonious displays.
The Solution: Limit color palettes to 3-4 harmonious shades plus white or cream. Use color wheels to determine complementary combinations and draw inspiration from spring’s natural color palette.
Inadequate Surface Preparation
Inadequate surface preparation results in poor adhesion, uneven finishes, and shortened decor life.
The Solution: Thoroughly clean all surfaces, lightly sand glossy finishes, and apply a suitable primer when needed. These additional steps ensure professional results.
Seasonal and Themed Project Ideas
Early Spring Themes
Expand your DIY Easter decoration projects to include early spring themes that fit the March-May period. Focus on growth, renewal, and new beginnings with seed packet displays, sprouting bulb arrangements, and rain-themed decorations.
Create “spring countdown” calendars that display different decorations for each week leading up to Easter. This approach spreads the workload of crafts while enhancing excitement for the holiday.
Easter Garden Party Ideas
Design decorations that seamlessly transition from indoor Easter celebrations to outdoor garden parties. Use weather-resistant materials and create decorations that complement natural garden settings.
Consider projects that incorporate live plants, herb gardens, and outdoor lighting for celebrations that extend into the evening.
Simple Modern Easter Decor
Adopt contemporary design principles with sleek lines, neutral colors, and geometric shapes. This approach appeals to interior designers who prefer simple touches to celebrate the holidays rather than traditional ideas.
Focus on quality over quantity, with less dramatic pieces that add a strong design touch.
The Bottom Line: Make Memorable DIY Easter Decorations
DIY Easter decoration projects offer endless opportunities to express creativity, engage family members, and create lasting memories while decorating your home for the most festive of spring holidays. From simple paper crafts that kids can master to sophisticated projects that challenge experienced crafters, you’ll find a perfect project to suit all skill levels and budgets.
The secret to successful DIY Easter decorating lies in advance planning, gathering high-quality materials, and allocating ample time for each project. Remember, handmade decorations don’t have to be perfect to be beautiful; the personal touch and love invested in each piece makes them special.
As you embark on your Easter decorating journey, start with one or two projects that excite you. Build your skills and confidence with each decoration you complete, then expand your creativity in the years to come. The techniques you learn while making your own Easter decorations will benefit you in other seasonal celebrations throughout the year.
Ready to get crafting? Choose your first project from this guide and gather your materials. Share photos of your finished Easter decorations on social media using the hashtag #EasterDIYDecor—we’d love to see your creative creations!
Don’t forget to sign up for our newsletter to receive more seasonal decorating ideas, money-saving tips, and step-by-step tutorials delivered directly to your inbox. We wish you happy crafting, and we hope your Easter celebration is filled with beautiful, DIY decorations that bring joy to your hearts and homes.
Best Amazon Picks :
FAQs
Q: How long do I need to prepare my DIY Easter decoration projects?
A: Most paper, fabric, and colored decorations can be prepared 4-6 weeks before Easter and stored in a cool, dry place. Fresh flower arrangements and planted decorations should be prepared 1-2 weeks before Easter to maintain their freshness.
Q: What is the average cost of DIY Easter decorations compared to store-bought products?
A: DIY Easter decorations typically cost 40-60% less than similar products in stores. A complete Easter decoration package, which can cost between $75 and $100, can often be prepared for $30-45 using DIY techniques.
Q: Can children safely participate in DIY Easter decoration projects?
A: Yes! Many projects are ideal for children with proper supervision. Choose non-toxic materials, avoid sharp tools, and choose age-appropriate projects. Children ages 3 to 5 can handle simple gluing and painting, while older children can handle more complex cutting and assembly tasks.
Q: What are the essential tools for Easter decorating projects?
A: Basic tools include sharp scissors, craft glue, a hot glue gun (for adults), a ruler, pencils, and paintbrushes. These basic tools are used in 90% of Easter decorating projects. Specialized tools can be added as your interest and skills develop.
Q: How do I make my DIY Easter decorations look professional?
A: Focus on clean lines, color coordination, and proper proportions. Take your time finalizing details, make sure all edges are neat, and use high-quality materials. Plan your design before you begin and don’t rush the process.
Q: Are there eco-friendly options for my DIY Easter decorating projects?
A: Absolutely! Use natural materials like twigs, leaves, and flowers. Recycle containers and packaging. Choose water-based paints and non-toxic adhesives. Many eco-friendly decorations can be composted after the holidays.
Q: What’s the best way to store your DIY Easter decorations for next year?
A: Wrap delicate items in tissue paper, store flat decorations in art cases, and use clear plastic containers for easy identification. Label everything clearly and store it in a cool, dry place. Take photos of completed displays for next year’s reference.
Q: How can I involve the whole family in my DIY Easter decoration projects?
A: Assign age-appropriate tasks to each family member. Younger children can sort materials and do simple gluing, while older children and adults handle the cutting and fine detailing. Create assembly line systems to efficiently produce multiple items.
Q: What should I do if my DIY Easter decorations don’t turn out as expected?
A: Don’t despair! Most projects can be modified or enhanced by adding additional elements. Add tape to cover unfinished edges, use markers to enhance drawn designs, or combine the piece into a larger display so individual imperfections become less noticeable.

One Comment
Comments are closed.