
DIY Halloween Decor: Easy Guide
Table of Contents
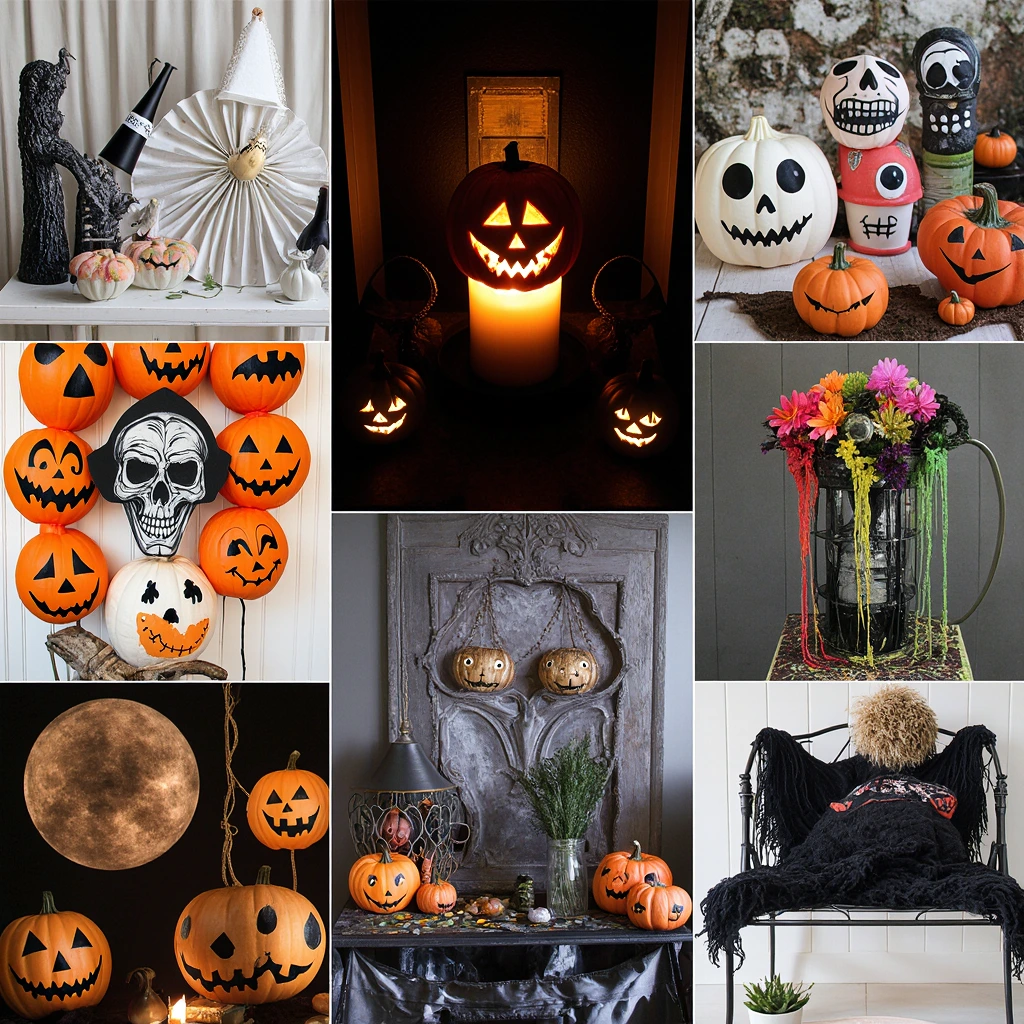
Turn your home into a spooky haunted house without breaking the bank! DIY Halloween decorations offer endless creative possibilities while staying within your budget. Whether you’re hosting a spooky gathering or simply want to enjoy the spooky season, making your own Halloween decorations offers both satisfaction and savings.
Making your own Halloween decorations not only saves money, but also allows you to unleash your creativity and create wonderful memories with your family. With store-bought decorations ranging from $50 to $100 per household, DIY alternatives can cut costs by up to 70% while delivering unique, personalized results that no store can match.
Why Choose DIY Halloween Decorating Over Store-Bought Options?
Budget-minded decorators are discovering that homemade Halloween decorations offer significant benefits beyond cost savings. Handmade decorations allow for complete customization to suit your home’s aesthetic and your family’s preferences. Stock-made decorations often lack durability and character. Mass-produced pieces are easily damaged and look identical to your neighbor’s. DIY projects, however, become conversation starters and cherished traditions that evolve with each Halloween season.
Environmental awareness is also driving many to decorate their homes themselves. Reusing household items and natural materials reduces waste and creates truly unique pieces. Your Halloween decor becomes an extension of sustainable living practices.
Essential Materials and Tools for DIY Halloween Projects
Before you dive into spooky crafting, gather these essential supplies for multiple home Halloween decorating projects:
Essential Craft Supplies
- Orange, black, purple, and white acrylic paints
- Sponge brushes and detail paintbrushes
- Hot glue gun with extra glue sticks
- Craft scissors and a utility knife
- Black electrical tape or washi tape
- LED string lights (battery-operated for safety)
Natural and Household Materials
- Cardboard boxes and tubes
- Mason jars and glass bowls
- Old white sheets and fabric scraps
- Newspapers and magazines
- Pumpkins, gourds, and pine cones
- Dried twigs and leaves
Featured Products Worth Investing in
- Glow-in-the-dark paint for eerie effects
- Gauze fabric for a spooky feel
- Metallic spray paints for elegant touches
- Battery-operated tea candles for safety Lighting
Simple DIY Halloween Decoration Projects
Ghostly Mason Jar Lights
Turn ordinary Mason jars into magical and beautiful light fixtures, perfect for lighting your hallways or decorating your tables.
Materials Needed:
- Mason jars (various sizes)
- White tissue paper or muslin
- Battery-operated tealight candles
- Black permanent marker
- Mod Podge or craft glue
Steps:
- Clean the Mason jars thoroughly and allow them to dry completely.
- Apply a thin layer of Mod Podge to the outside of the jar.
- Wrap them in tissue paper or muslin, creating a wrinkled texture.
- Draw simple ghost faces with black marker after they dry.
- Place a battery-operated tealight candle inside for a safe glowing effect.
- Group several jars together for a dramatic effect.
Cardboard Gravestone Cemetery
Create an impressive graveyard scene using cardboard boxes and basic painting techniques.
Materials Needed:
- Large cardboard pieces
- Gray acrylic paint
- Black paint for details
- Sponge brushes
- Pencil for drawing
- Craft knife for cutting
Processing Instructions:
- Draw the tombstone shapes on the cardboard – varying the height and width.
- Cut the shapes using a craft knife (adult supervision required).
- Apply a base coat of gray paint, showing brush strokes to add texture.
- Add aging effects using a dark gray dry brush.
- Paint phrases like “R.I.P.”, “Here Lies,” or humorous phrases.
- Secure them to the ground using wooden stakes attached to the back.
Spooky Silhouette Window Decals
Turn windows into spooky focal points with removable silhouette decorations.
Materials Needed:
- Black adhesive paper or vinyl
- Printed templates
- Craft knife
- Transfer tape (for vinyl)
- Squeegee or credit card
Assembly Steps:
- Print the desired silhouette templates (bats, cats, witches, trees)
- Trace them onto the adhesive backing paper
- Carefully cut the designs using a craft knife
- Remove the backing and place them on clean window surfaces
- Clean up any air bubbles with a squeegee
- Remove easily after Halloween without leaving any residue.
Advanced DIY Halloween Decorating Ideas
Floating Ghosts
Create amazing floating ghosts using simple materials and proper lighting.
Materials Needed:
- Styrofoam balls (various sizes)
- Lightweight white fabric or gauze
- Fishing line or clear string
- Mini LED lights
- Spray adhesive
Assembly Instructions:
- Insert a small LED light into the head of the Styrofoam ball.
- Wrap fabric over the ball and secure with spray adhesive.
- Attach fishing line to the top for hanging.
- Vary the heights when hanging for a dynamic effect.
- Place near air vents for natural movement.
Centerpiece Witch Hat Kit
Create stylish witch hats that can be used as candy bowls or decorative items.
Materials Needed:
- Black poster board or cardstock
- Compass or string for circles
- Stapler or hot glue
- Decorative items (ribbons, buckles, flowers)
- Clear protective spray paint
How to Make:
- Make a cone shape from a triangle of poster board.
- Cut a circular edge with a center hole matching the base of the cone.
- Secure the cone to the edge using staples or hot glue.
- Decorate with ribbons, buckles, or fall flowers.
- Seal with a protective coating for durability.
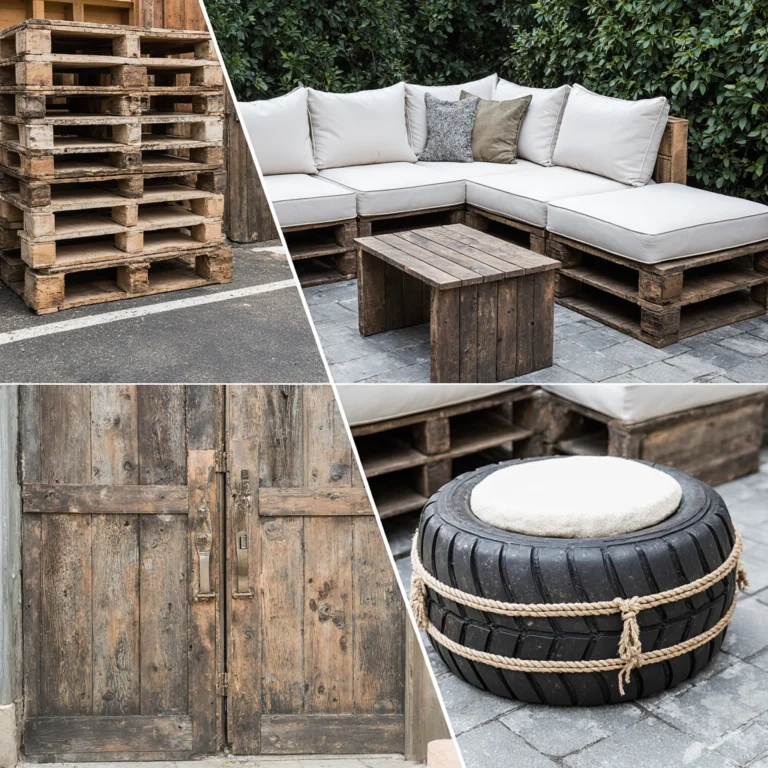
Recycling and Reusing Ideas for Halloween Decor
Sustainable DIY Halloween decor relies on creatively reusing everyday items, turning potential waste into stunning seasonal displays.
Plastic Bottle Lanterns
Turn plastic bottles into spooky outdoor-resistant lanterns.
Cut decorative patterns onto clean plastic bottles, spray paint them with clear paint, and insert battery-powered lights. These weatherproof lanterns are perfect for outdoor Halloween displays.
Newspaper Mummy Decorations
Turn old newspapers into spooky mummy figures for indoor or outdoor use.
Wrap mannequins, clothes hangers, or wire figures with newspaper strips, leaving strategic gaps for a vintage look. Finish with tea dye for an authentic vintage look.
Tin Can Lights
Repurpose food cans into stylish Halloween light fixtures.
Punch clean cans with decorative patterns using a hammer and nails. Paint them with rust-resistant spray paint and insert LED candles for safe lighting.
Seasonal and Themed Project Kits
Fall Harvest Halloween Mix
Combine traditional fall elements with spooky Halloween touches for stylish seasonal decor.
Add miniature pumpkins, colorful leaves, and warm lighting with subtle Halloween elements like small bats or crows. This approach is perfect for homes that prefer elegant autumnal vibes over bold Halloween touches.
A Charming Gothic Touch
Elevate your DIY Halloween decor with sophisticated gothic elements using metallic paints and rich fabrics.
Focus on shades of deep purple, metallic silver, and deep black. Add velvet ribbons, vintage frames, and candle holders for a sophisticated Halloween atmosphere.
Spooky Family Fun
Create exciting Halloween decorations without scaring young children.
Focus on friendly ghosts, smiling jack-o’-lanterns, and bright colors. Avoid creepy faces or disturbing images while maintaining the festive Halloween spirit.
Common Mistakes in DIY Halloween Decorations and How to Avoid Them
Overcomplicating Simple Projects
Many beginners attempt projects that are overly complex, leading to frustration and abandonment.
The Solution: Start with simple projects and gradually build your skills. Master simple techniques before attempting complex displays.
Ignoring Weather Considerations
Outdoor garden decorations often fail due to inadequate weather planning.
The Solution: Use weather-resistant materials and sealants. Plan for wind, rain, and temperature changes in your area.
Poor Planning and Preparation
Rushing through projects without proper planning leads to incomplete or poorly executed decorations.
The Solution: Create detailed project lists with timelines. Gather all materials before starting any project.
Ignoring Safety Considerations
Sometimes the excitement of Halloween overwhelms basic safety practices.
Solution: Always use battery-powered lights near flammable materials. Make sure aisles are well-lit and clear of obstructions.
Budget-Friendly Shopping Strategies
Stretch your DIY Halloween decoration budget by shopping strategically and securing materials.
Dollar Store Treasures
Dollar stores offer excellent bases for DIY projects, including plastic skulls, foam brushes, and basic craft supplies.
Thrift Store Finds
Thrift stores offer unique pieces perfect for adding a Halloween touch: vintage picture frames, old books, and antique-themed boxes.
Scavenge Natural Materials
Collect free natural materials, such as twigs, pine cones, and unique stones, from your property or public spaces (with permission).
End-of-Season Sale
Purchase Halloween supplies at discounted prices after the holidays for next year’s projects, saving 50-90% on materials.
Create Unforgettable Halloween Experiences
Halloween decoration projects become cherished family traditions, creating lasting memories that go beyond just decorations.
Engage children in age-appropriate craft activities. Simple projects, such as painting mini pumpkins or assembling paper bag lights, teach creativity and boost self-confidence.
Document your DIY journey with photos and notes. Create a Halloween decoration journal, recording successful projects, material costs, and improvement ideas for future years.
Consider hosting a Halloween craft party where friends contribute materials and labor, and share ideas and techniques.
The Bottom Line: An Amazing DIY Journey Awaits
Create your own Halloween decor to transform your home and your Halloween experience. These budget-friendly projects deliver professional results, build valuable crafting skills, and create unforgettable family memories.
Start with simple projects that fit your current skill level and available time. As your confidence grows, work your way up to more complex decorating projects that showcase your evolving skills.
Remember, imperfections add a unique touch to handmade decorations. Embark on a creative journey and enjoy the joy of displaying your unique creations this Halloween.
Ready to embark on your DIY Halloween adventure? Share photos of your completed projects in the comments below, and don’t forget to subscribe for more budget-friendly decorating ideas throughout the year!
Best Amazon Picks :
FAQs
Q: When should I start making DIY Halloween decorations?
A: Start planning 4-6 weeks before Halloween to allow enough time to gather materials and complete projects without rushing. Simple decorations can be completed in one to two weeks, while elaborate displays may require a month of preparation.
Q: What is the most cost-effective way to create stunning Halloween decor?
A: Focus on lighting and silhouettes for maximum effect at minimal cost. Battery-powered LED lights, black contact paper for window silhouettes, and repurposed household items create stunning effects for under $20.
Q: Are DIY Halloween decorations safe for outdoor use?
A: Yes, provided they are weatherproof and properly constructed. Use paints, sealants, and battery-powered lights designed for outdoor use. Secure all decorations against wind and ensure they do not create a tripping hazard.
Q: How can I make my own Halloween decorations that won’t scare young children?
A: Choose friendly faces, bright colors, and eerie themes. Focus on pumpkins, friendly ghosts, and harvest elements instead of scary images. Involve children in the creative process to reduce fear.
Q: What are the essential tools for homemade Halloween projects?
A: A hot glue gun, craft scissors, foam brushes, and basic acrylic paints are used in 90% of homemade Halloween projects. These versatile tools suit a variety of project types and skill levels.
Q: Can I reuse homemade Halloween decorations year after year?
A: Absolutely! High-quality homemade Halloween decorations often last longer than store-bought alternatives. Store them carefully in labeled containers, use weather-resistant materials, and make minor repairs as needed to extend their lifespan.
Q: How do I achieve professional results with basic skills?
A: Focus on clean lines, color coordination, and good preparation. Take your time with each step instead of rushing. Watch online tutorials and practice techniques on scrap materials before starting your final projects.
2 Comments
Comments are closed.